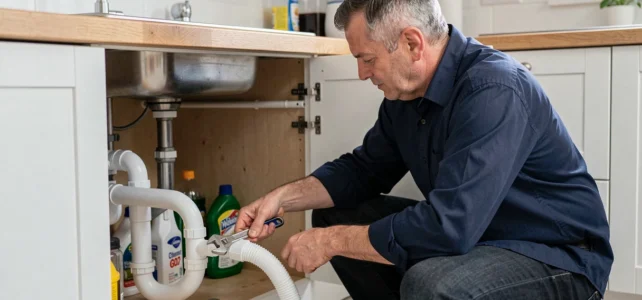
When installing a dishwasher next to the sink without a dedicated wall outlet, connecting to the existing siphon remains the most straightforward solution. The dishwasher drain connection to the sink does not require major work or professional plumbing skills, provided that a few sizing rules that most appliance manuals overlook are respected.
Diameter DN 50 on shared drainage: the rule that manuals forget
Many tutorials still recommend a 40 mm pipe for the entire drainage line. This recommendation applies to a sink alone. As soon as a dishwasher connects to the same drain, the diameter increases to DN 50 to handle the combined flow and limit backflow.
The GFAL website reminds us in 2026 that a sink paired with a dishwasher always requires DN 50. Sorel·Est confirms this rule and specifies a recommended wall outlet height of 50 to 60 cm from the floor for a compact installation.
Specifically, if your current siphon is 40 mm and you add a dishwasher, it is recommended to replace the horizontal section leading to the wall outlet with PVC DN 50. The cost of the part is negligible, but the impact on the reliability of the installation is real: fewer clogs, less dirty water backing up into the sink during the draining cycle.
To achieve a durable dishwasher drain connection to the sink, this diameter question must be addressed even before purchasing any fittings.
Drain slope under the sink: how to check it without a laser level
The DTU 60.11 standard imposes a minimum slope of 1 cm per meter on drainage pipes. In practice, under a kitchen sink, we work with short lengths (rarely more than one meter between the siphon and the wall outlet). But it is precisely over these short distances that the slightest slope defect causes backflow.
To check, a mason’s rule and a bubble level are sufficient. Place the rule on the horizontal pipe between the siphon and the wall. If the bubble is centered or if the pipe slopes slightly toward the wall, the slope is correct. If the pipe rises, even by a few millimeters, the mounting brackets need to be repositioned.
When the slope is impossible to correct
In some older kitchens, the wall outlet is almost at the same level as the bottom of the siphon. This results in a negative slope that no bracket can correct. In this case, there are two options:
- Raise the siphon by installing a more compact model or by raising the sink a few centimeters (possible on a standard kitchen cabinet with adjustable legs).
- Drill a new lower wall outlet, which requires crossing the partition and connecting to the vertical drainage network, a heavier job but sometimes the only viable option.
- As a last resort, a compact lifting pump under the sink can force the drainage, but it adds noise and an additional point of failure.
Feedback varies on this point: some installers tolerate an almost zero slope over 50 cm, while others categorically refuse. It is better to aim for 1.5 to 2 cm per meter to maintain a safety margin.
Anti-siphon loop: height and wall mounting
The high loop of the drainage pipe prevents wastewater from the sink from flowing back into the dishwasher. This is mentioned in all guides, but the important detail is the exact height and how to secure this loop so that it holds over time.
The highest point of the loop must be above the drainage level of the sink, generally around 60 cm from the floor. If the flexible pipe gradually descends under its own weight (which happens within a few months), the loop loses its barrier function.
The most reliable mounting: a stainless steel clamp screwed into the inner wall of the under-sink cabinet, at the correct height. The flexible pipe passes through this clamp, and it stays in position even when rummaging under the sink to grab a cleaning product. A simple plastic cable tie will eventually loosen.
Check valve: useful or unnecessary
If the high loop is correctly installed, the check valve is not mandatory in most configurations. It becomes necessary when the drainage height exceeds 60 cm or when the dishwasher shares its line with a washing machine. A check valve costs between 5 and 20 euros and is placed directly on the drainage pipe, on the siphon side.

Connection on sink siphon: choosing between side inlet and Y connection
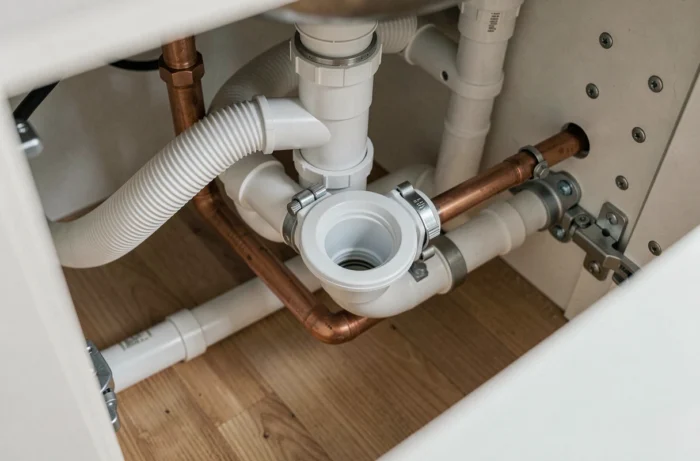
The majority of siphons sold today include a side inlet with a removable cap. You remove the cap, fit the flexible pipe from the dishwasher, and tighten a clamp. The operation takes five minutes.
When the siphon does not have a side inlet (common in installations over fifteen years old), there are two options:
- Replace the siphon with a model that has an integrated machine inlet, ensuring that the outlet diameter matches the existing pipe (DN 40 or DN 50).
- Install a Y connection between the siphon and the wall outlet, allowing the dishwasher to be connected without touching the siphon itself.
- In both cases, apply PTFE tape or a new O-ring on each threaded connection to ensure a watertight seal.
After assembly, run a short empty cycle and monitor each junction throughout the draining process. A micro-leak at a poorly tightened clamp may not be immediately visible, but it will eventually damage the bottom of the cabinet.
The most telling test: slide a sheet of absorbent paper under each connection during the first complete cycle. If the paper remains dry, the installation is good. Otherwise, tighten or replace the faulty seal before closing the cabinet.